pie dough

Buttermilk Pie Dough by Madeline Chen

by Judy Kim

Buttermilk Pie Dough Judy Kim

Buttermilk Pie Dough

Yield: Two 8 to 10-inch single-crust pies or one double-crust pie

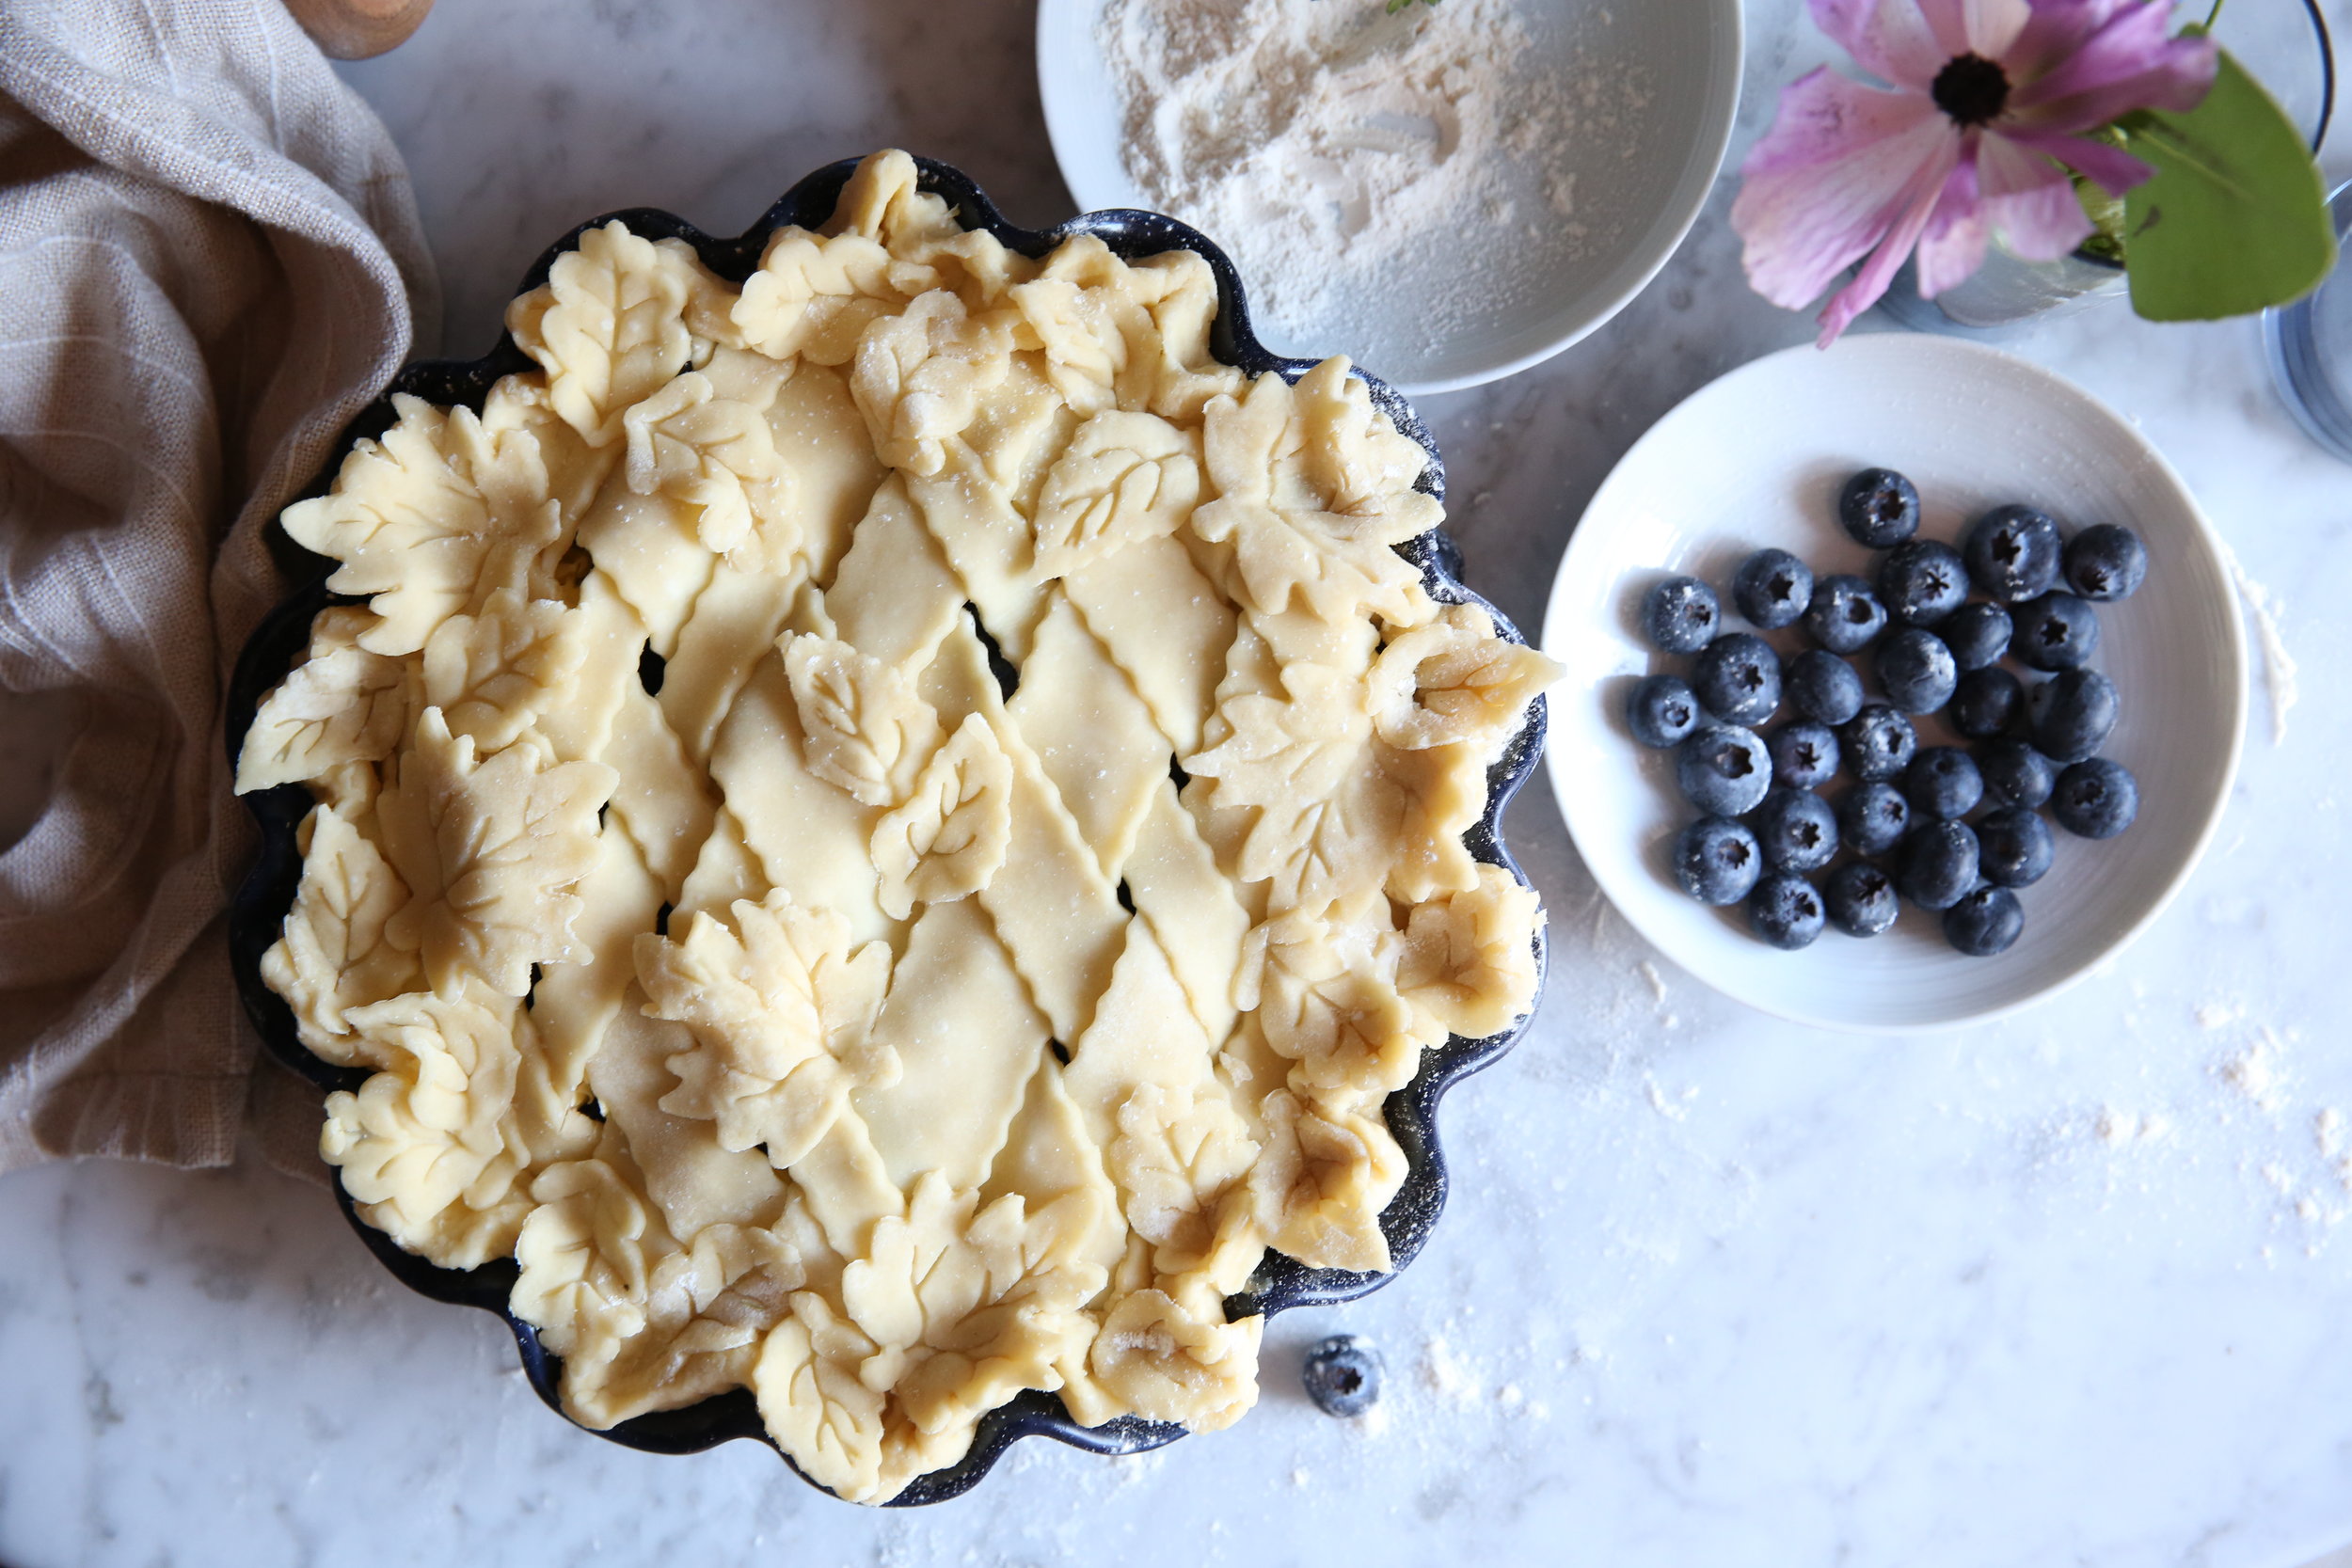
This is an easy and forgiving recipe for a tender and flaky crust. I also developed it to make more dough than your average double crust pie recipe. Which is very handy if you’re making a lattice or decorative pie.

INGREDIENTS

3 cups unbleached all-purpose flour, additional for rolling

1 teaspoon kosher salt

2 tablespoon sugar

½ pound (2 sticks) unsalted European style butter, cut into ½-inch cubes and chilled

1/2 cup chilled buttermilk

DIRECTIONS

  1. In a large deep mixing bowl combine flour, salt, and sugar. Bring pre-cut butter to room temperature for a few minutes and add all at once into flour mixture. Toss until each piece of butter is coated. Using your hands, break butter into the flour by pressing it between your index finger and thumbs while using a slow snapping or sliding motion. It will create large flattened shards of butter covered in flour. Rotate through all the pieces of butter until they have all been fully flattened out and well coated. There should not be any large pieces of butter left and the mixture should look shaggy at this stage.

  2. Using your hands, level the flour mixture and create a slight well in the center. For even distribution use a pour spout liquid measure to drizzle small amounts of chilled buttermilk all over the center of the flour. Using your hands toss mixture from the side to the top in order to keep liquid away from your hands and from touching the bowl; buttermilk should be incorporated rather than all over your hands or creating wet spots on the bowl. Wait until buttermilk is fully absorbed before each addition. Keep mixing with your hands and eventually squeeze the mixture together in your fist to test the consistency, it should just stick together.

  3. Spread a light dusting of bench flour on a clean surface and knead the dough 5 to 7 turns until it forms a ball. The dough will be slightly wet so add flour as needed to prevent sticking. Don’t be afraid to knead the dough until it’s smooth and all the loose bits are incorporated. Lightly coat the dough all over with flour. Cut the dough in two pieces, about 1/3 and 2/3 ratio. Place cut side down onto plastic wrap; tightly wrap and form the smaller piece into a flattened round about 1-inch thick, ideal for the base of your pie. Form the larger piece into a flattened rectangle also 1-inch thick. Sometimes I even cut the dough into equal 1/3 pieces, it’s often easier to work with smaller pieces and keep other pieces in the refrigerator. Chill for one hour to rest, at minimum 20 minutes. Bring dough to room temperature for a few minutes before rolling. I like to soften the edges of the dough while it’s still wrapped before rolling to prevent cracking.

  4. Dust surface and rolling pin with bench flour. This dough is well hydrated, so no need to be worried about adding bench flour, use when needed. Roll smaller round into a circle between 1/8 to ¼-inch thickness. Roll from the center outwards and lighten pressure of the rolling pin before you reach the edge, this keeps the thickness even. Slightly turn pastry after each roll to prevent sticking and add bench flour when needed. When the pastry begins to flatten out, concentrate the rolling pin movement in an upward and circular motion mimicking the curve of the dough, again lightening pressure before reaching the edge, this helps keep it round. When dough is larger than the size of your pie dish, gently fold into quarters and place inside the pie dish. Ensure it is well centered and nestled into the corners without stretching to prevent shrinkage while baking. Using your dominant hand, take the flat part of your upper index finger and gently press the dough into the base corners of the pie dish, while the other hand gently lifts each edge of dough to ensure it is not being stretched.

  5. For a classic crimp, trim dough ½-inch past the rim, reserving leftover pieces of dough. Fold under and crimp using the thumb of your dominant hand while pushing into the index finger and thumb of your other hand forming a subtle v-shape. Place pie dish and dough trimmings on rimmed sheet pan, and chill in refrigerator while you roll your second piece of dough into a rectangle. Use dough to make a dough crust, long strips for a lattice or use pie cutters to create embellishment pieces. Leftover trimmings from the base crust can be rolled out to be used with a pie cutter.


Pro Tip: Make a double batch of pie dough and label the plastic wrap (I prefer this brand as it is the stickiest and has a convenient slide for cutting) with the date for future use. You'll make your next pie in half the time. Keep dough tightly wrapped up to 5 days in the fridge or up to 3 months in the freezer. Thaw frozen dough in the refrigerator overnight.

Rustic Pie Dough by Judy Kim

by Judy Kim


Rustic Pie Dough

Yield: Two 8 to 10-inch single-crust pies or one double-crust pie

This is a no-fuss dough recipe made without a food processor or pastry cutter. Living proof that pastry can be made on a hot Summer day but still be delicious and flaky. I made this on a trip to Charleston, SC in August, so you can imagine the high humidity in an already hot kitchen. Needless to say, it was not an ideal situation for baking. Since I was in the South, the use of lard just seemed apropos and I paired it with my favorite high butterfat European butter. Most likely the reason this rustic thrown together dough tastes so delicate despite the thrown together process.

I would suggest using this pastry for simple galettes or tarts. If you're looking for pastry to make a decorative pie, use my Vodka Pie Crust or Vodka Pâte Brisée Pie Crust


INGREDIENTS

2 1/2 cups all-purpose flour, additional for rolling

1 teaspoon flaky sea salt, such as Jacobsen Salt

12 tablespoons unsalted European style butter (1 1/2 sticks), cut into 1/2-inch cubes, I use Vermont Creamery European Cultured Butter with 86% butterfat

1/4 cup lard (or shortening)

1/4 cup cold water

DIRECTIONS

  1. In a large mixing bowl combine flour and sea salt. Add butter and break butter into the flour by pressing the butter between your index finger and thumbs using a slow snapping motion. It will create large chards of butter. Rotate through all the pieces of butter until they have all been flattened out and coated in flour to avoid clumps. Add the lard and continue to mix with your hands. Work quickly to prevent the butter from melting from the warmth of your hands. The mixture should look slightly lumpy.

  2. Add 1 tablespoon of cold water at a time and combine until the dough comes together. I used 1/4 cup of cold water. Chilled water using ice cubes is the most ideal, but cold filtered tap water is fine.

  3. Spread a thin dusting of bench flour and knead the dough just until it forms a ball. Avoid using too much bench flour and over kneading or the pastry will get tough. Cut the dough in half and wrap tightly in plastic wrap and form into a round or rectangle, based on your final desired shape. Chill in the fridge until ready for use. Bring to room temperature for a few minutes before rolling.

Note: European butter is different than regular butter, it has a high level of butterfat and will soften very easily. I typically keep this butter in the freezer until I'm ready to use it. At minimum keep it in the fridge. 

Pro Tip: Make a double batch of pie dough and label the plastic wrap with the date for a future use. You'll make your next pie in half the time. Freeze dough up to 3 months.

Vodka Pâte Brisée Pie Crust by Judy Kim

by Judy Kim


Vodka Pâte Brisée Pie crust

Yield: One 8 to 10-inch double-crust pie or two large half sheet pan galettes

This is a far cry from the pie dough recipe I remember as a kid. We used a recipe my Mom saved from a school bake sale, the recipe card was so cute. It was written on red construction paper in the shape of an apple and the recipe was made with pure Crisco. It guaranteed flaky results, but now I expect more from pie crust. Luckily I spent a fair amount of my previous career traveling to France, and like anyone that visits the Pâte Brisée motherland, you'll never turn down an all butter pastry. I wanted to create my own version of an all butter pie crust recipe, one that takes the anxiety out of pie making and is friendly for decorative pie making. Vodka is certainly not traditional to French baking, but I now use it regularly. This recipe yields an unusually pliable dough that is so much easier to roll out and handle. My first pie dough, Vodka Pie Crust is made with butter and shortening is even more fool proof, but similar, so it's really a matter of preference in terms of texture and flavor.

INGREDIENTS

12 tablespoons unsalted butter (1 1/2 sticks, up to 2 sticks for extra buttery pastry), cut into 1/2-inch cubes and frozen in advance. I prefer Vermont Creamery European butter  

1/2 cup vodka

2 1/2 cups all-purpose flour

1 teaspoon flaky sea salt, crushed by hand

DIRECTIONS

  1. Cut butter into 1/2-inch cubes and freeze overnight, minimum of 5 minutes if you're short on time.

  2. In a liquid measuring cup pour vodka, then add several ice cubes. Wait until vodka is chilled and remove ice. Most likely you'll reach 3/4 cup measurement from the melting ice cubes, but if not just add a touch of chilled water. If your vodka is frozen, just add 1/4 cup iced water.

  3. Combine flour and salt in a large mixing bowl. Add frozen butter and toss together quickly until each piece of butter is coated with the flour mixture, this will ensure an even dough. Break butter pieces apart if they are stuck together. Transfer to the bowl of a food processor fitted with a steel blade; pulse 2 to 3 times until the size of chickpeas.

  4. Pour vodka mixture through feed tube in a steady stream while constantly pulsing until dough begins to pull together. Avoid running the machine automatically or it may overmix. Butter and shortening should be about the size of dried lentils. Pro tip: Pour all the liquid into the feed tube, it's designed to stream an even amount and will help absorb all the flour evenly.

  5. Carefully turn dough out onto a very lightly floured work surface and remove the blade. Try to use no more than 1 tablespoon bench flour as flour can make the dough tough. Working on marble or granite countertop will help keep the dough cool. Note, the dough is slightly wet and more elastic than typical recipes. It's not necessary to knead the dough, just enough to pull it together with a few turns at the most.

  6. Divide dough in half. Wrap each half in plastic wrap and shape the dough into a round or rectangle. I find the dough will stay cooler if I shape it after wrapping and it reduces the need for additional bench flour. If you are using a round pie dish, shape dough into a flattened disk or rectangle if you are making a galette or lattice strips; this will help eliminate wastage. Refrigerate for minimum of 2 hours, preferably overnight.

  7. You can freeze the dough up to 3 months, just wrap well. If you have left over scraps I cut them into manageable pieces and wrap them in parchment paper and stack the pieces. The parchment will prevent them from sticking. Wrap in plastic wrap tightly and freeze to use for cut outs on a future pie.

**For decorative pie tips, read the notes written on my Vodka Pie Crust recipe.


Vodka Pie Crust by Judy Kim

by Judy Kim


VODKA PIE CRUST

Yield: Two 8 to 10-inch single-crust pies or one double-crust pie

I've been working on this recipe for years and love the results. It's been rewritten and improved every few months. It's particularly great for decorative pies or anyone new to pie making because the vodka makes it very pliable. By using both butter and shortening, it creates a silky consistency. Vodka may seem to be the star, which does help reduce the formation of gluten, but I think technique reigns supreme for success. The key is evenly distributed butter and flour, which is easy to control in a food processor if you use the pulse feature. Big butter chunks may seem ideal, but they create an unevenly textured pie.  For another simple dough I prefer to make by hand, try my Buttermilk Pie Dough.


INGREDIENTS

12 tablespoons unsalted butter ( 1 1/2 sticks), cut into 1/2-inch cubes and frozen in advance. I prefer Vermont Creamery European butter

1/2 cup vodka

2 1/2 cups all-purpose flour

1 teaspoon kosher salt

2 tablespoons shortening, frozen

DIRECTIONS

  1. Pour vodka into a liquid measuring cup, then add several ice cubes. Wait until vodka is chilled and remove ice after a few minutes. Vodka water mixture should reach 3/4 cup measurement. (If you prefer to use less vodka, try 1/3 cup vodka with 1/4 cup ice water.)

  2. Combine flour and salt in a large mixing bowl; add frozen butter and shortening. Toss together quickly with your hands to coat each piece of butter and shortening with flour mixture, helps ensure an even dough. Transfer to the bowl of a food processor fitted with a steel blade; pulse 2 to 3 times until the size of chick peas.

  3. Pour vodka mixture through feed tube in a steady stream while constantly pulsing until dough begins to pull together. Avoid running the machine automatically or it may overmix. Butter and shortening should be about the size of dried lentils. Pro tip: Pour all the liquid into the feed tube, it's designed to stream an even amount and will help absorb all the flour evenly if you keep pulsing.

  4. Carefully turn dough out onto a lightly floured work surface and remove the blade. The dough is very hydrated, so use bench flour when needed. Working on marble or granite countertop will help keep the dough cool. Knead dough until smooth, turn 5 to 6 times.

  5. Divide dough in half. Wrap each half in plastic wrap and shape the dough into a round or rectangle. I find the dough will stay cooler if it's shape after wrapping and it reduces the need for additional bench flour. If you are using a round pie dish, shape dough into a flattened disk or rectangle if you are making a galette or lattice strips; this will help eliminate wastage. Refrigerate for minimum of 2 hours, preferably overnight.

  6. You can freeze the dough up to 3 months, just wrap well. If you have left over scraps I cut them into manageable pieces and wrap them in parchment paper and stack the pieces. The parchment will prevent them from sticking. Wrap in plastic wrap tightly and freeze to use for cut outs on a future pie. Or cut out decorative pieces using a pie cutter and freeze in a single layer, when frozen solid keep in air tight plastic container.

NOTES FOR DECORATIVE PIES:

If you desire a decorative pie using cut out shapes, try purchasing pie cutters at a local specialty store, Williams Sonoma or online such as Amazon . Cookie cutters are another favorite. Generally I prefer pie cutters since they give a detailed impression mark due to their plunger design. The texture will give a rich detail to your pie.

Using pie cutters is a great way to use excess dough. Keep pastry cut outs in the freezer and bake them off as needed. Brushing with cream or an egg wash will make them golden. I suggest using them for a topping on desserts like ice cream or berries with whipped cream. I've even been known to put them with skillet eggs and arugula. 

If you want to layer a lot of cut outs on your pie such as a fallen leaf layout, roll the dough a bit thinner since they will overlap. Cut out the shapes and place in a single layer on a parchment lined quarter sheet pan or any tray that will fit in the freezer. Once frozen use the them right away or stack the shapes into an airtight container for future use. The shapes can be scattered all over a fruit pie in place of a top crust.

For a custard pie that requires blind baking, create the pie cut outs a few hours in advance or the day before and freeze them solid. This will help them resist heat to maintain their shape and placement while baking. Roll the bottom layer 1/8-inch thick, place into a pie dish and trim neatly with scissors or a sharp paring knife. The shapes can be attached to a simple crust and form a wreath by brushing the backside with heavy cream. Freeze pie crust for about 5 to 10 minutes before blind baking. Pro tip: preheat oven with Baking Steel or your favorite pizza stone. There's no need to blind bake the pie! Place your pie dish on top of a rimmed sheet pan and place on top of the Baking Steel, and your bottom crust is be crispy. Eliminating blind baking is a huge time saver. I bake all my regular and custard pies on the steel, I just left it in the oven.

* recipe updated August 2018

Apple & Blood Orange Garden Trellis Pie by Judy Kim

by Judy Kim


Apple & Blood Orange Garden Trellis Pie

Yield: 1 (9-inch) Pie

Created a new twist on apple pie. Blood oranges aren't a typical addition to pie, but I had them around and wanted to use them in place of lemon for some acidity. This design was inspired by a garden trellis woven with twisty vines. I've always had an affinity to gardening and all things floral, I get it from my Mother. I've included directions to create this design but the truth is, all designs don't go exactly as planned, so feel free to go rogue. I often utilize leaf and floral cut outs to cover up mistakes like broken pastry. There are some trouble shooting tips below. Regardless, true beauty and imperfection sit side by side in my book. 

You can watch my pie demo video below.

INGREDIENTS

1 double crust, such as Buttermilk Pie Dough

1/4 cup all-purpose flour, plus additional for rolling pastry

1 egg

1 tablespoon heavy cream

1 blood orange, zested and cut into supremes

3/4 cup sugar

1 teaspoon kosher, such as Jacobsen sea salt

1/4 teaspoon aromatic bitters

1/4 teaspoon ground cinnamon

1 teaspoon pure vanilla extract

5 (about 3 pounds) medium Granny Smith apples, peeled, cored and thinly sliced on mandoline

3 tablespoons unsalted butter, cut into 1/4-inch cubes and frozen

DIRECTIONS

  1. Prepare the Buttermilk Pie Dough recipe, which can be made in advance.

  2. Before rolling, let the pie dough come to room temperature, about 5 minutes, to prevent cracking. On a lightly floured surface, roll out round disk to thickness between 1/8-inch and 1/4-inch. Keep dough moving and apply just enough flour to prevent it from sticking. Try avoid using too much flour to prevent the pastry from getting tough. Gently fold in half and again into a quarter, then transfer over your pie dish. Drape dough and nestle into the corners of the pie dish. Trim pastry with scissors or a sharp paring knife along the rim, chill trimmed pastry; roll out pastry a bit thinner and cut out leaves using a small leaf pie cutter. These will be used to make the leaf crown around the crust. Place on a generously floured rimmed sheet pan. Keep pie dish and sheet pan in fridge until ready to use.

  3. Roll out rectangular piece of pastry to 1/8-inch thickness. Using a fluted edge pastry wheel, cut a variety of narrow and wide strips to create the lattice and twisted cables. Use remaining dough to cut out shapes such as flowers and leaves for decoration. To make the leaves look more realistic, try bending them a bit. Place lattice strips in a single layer on a new floured sheet pan; chill in refrigerator. Add flowers and leaves to previously prepared sheet pan with leaves and keep in the fridge, preferably freezer until ready to use.

  4. Place oven rack in middle and preheat oven to 425°F. In a small bowl beat egg with heavy cream; set aside.

  5. In a large mixing bowl, add blood orange zest and supreme orange segments. Drain and discard any excess liquid from the oranges. Mix in sugar, salt, bitters, cinnamon and vanilla extract. Fold in apples until well coated; sprinkle 1/4 cup flour and toss again. Transfer apple mixture into pie dish and try to keep the mixture even. Scatter frozen butter cubes evenly all over the apples.

  6. Remove sheet pans with remaining pastry from the fridge or freezer. To create a simple lattice design, place strips (any width you prefer) in one direction across the entire pie. Lift every other row, place another strip in the opposite direction and flip the strips back down. Alternatively lift every other row, place another strip in the opposite direction and flip strips back down again until the lattice is complete. Try to keep the lattice pieces close together to cover most of the filling, this will help trap in steam and make a tender filling.

  7. To create cable knit roping, loosely twist 2 strips of similar width together to create a cable knit effect. Try to keep the strips flat to create an even cable. For my Garden Trellis design I mixed in cable knit ropes, a row of leaves and a row of flowers with the wavy flat strips.

  8. Using a sharp paring knife, trim the excess lattice work. Gently lift the ends of the lattice work and brush a light coating of egg wash to glue down the strips to the pie shell. Brush the top edge of the crust with egg wash. Place leaves on a 45° angle, press down lightly and alternatively place leaves in opposite directions to create a crown crust.

  9. Brush a light coating of egg wash evenly all over the pie. Place pie dish on a sheet pan and bake on the center rack for 15 minutes. Reduce oven to 375°F, bake until bubbling and golden brown, about 75 minutes. If necessary, rotate the pie for even baking and cover with foil if the top is browning too much. For best results, let pie cool for 4 to 6 hours before serving. Or bake the day before. Note: pie must be bubbling or filling will not be tender and crust will not be crispy.


Salted Caramel Pear Pie by Judy Kim

by Judy Kim


Salted Caramel Pear Pie

Yield: 1 (9-inch) pie

I love this lesser known combination in comparison to apples and caramel, but it easily interchangeable, perhaps one the things I love most about pie. Recipes are suggestions and hope that with each pie, each baker personalizes them with small changes and substitutions when necessary.

This Springtime Garden Wreath pie design is a labor of love. In many ways the making of this is no different than the arts and crafts techniques I learned from my Mom. But I say, make a pie that suits you, and if time is a factor use a full pie crust in lieu of this detailed design, it will still taste delicious. See the video below for a demo.

INGREDIENTS

Crust:

1 double crust pie dough, such as Buttermilk Pie Crust

All-purpose flour, for rollling dough

1 egg

1 tablespoon heavy cream for egg wash

Salted Caramel:

3/4 cup sugar

1/2 cup unsalted butter (preferably European butter), sliced into 1/2-inch cubes

1/2 cup heavy cream, extra for egg wash

1/2 teaspoon almond extract

1 teaspoon flaky sea salt

Filling:

4 Anjou pears - peeled, cored and thinly sliced

1 tablespoon lemon zest (suggest Meyer lemon if available)

1 lemon, juiced

1/4 cup sugar

3 tablespoons tapioca flour (or cornstarch)

1/2 teaspoon ground cinnamon

1 teaspoon pure vanilla extract

1/2 teaspoon flaky sea salt

2 tablespoons unsalted butter, cut into 1/4-inch cubes and frozen

DIRECTIONS

  1. To make the salted almond caramel, heat a large sauce pan over medium heat. Combine 1/4 cup water and 3/4 cup sugar, swirl the pan to help them dissolve. Add slices of butter, bring to a boil and simmer until golden brown, about 10 minutes. At this stage, stir occasionally using a wooden spoon. Watch the mixture carefully as it can burn. Turn off heat and add heavy cream carefully as it will bubble intensely. While continuing to stir, add almond extract (for stronger flavor add 1 teaspoon almond extract instead) and sea salt. Set aside to cool. This can be made in advance and kept in the refrigerator for a few weeks.

  2. Let the prepared Buttermilk Pie Crust come to room temperature, about 5 to 7 minutes before rolling out. On a lightly floured surface, roll out round disk to 1/8-inch thickness and larger than the circumference of your 9-inch pie dish. Gently fold into quarters and transfer to the pie dish. Trim excess with scissors or a knife along the rim and place pie dish in the fridge.

  3. Leftover dough from the bottom crust can be used for decorative cut outs in the shape of leaves and flowers. I prefer to use two different leaf shapes when possible. It may be necessary to roll a bit thinner and chill in the freezer for a few minutes. Dust each side of chilled leftover dough before using pie cutters or cookie cutters to cut out shapes. Lay them in a single layer on a quarter sheet pan dusted with flour, lay parchment paper between layers of pastry as needed. Place cut outs in the freezer.

  4. Remove second piece of pie dough from fridge and let come to room temperature before rolling to 1/8-inch thickness. To make this design, it is preferred if dough is pre-shaped into a rectangular. Use a ruler to cut long strips for the lattice work. To re-create my design, you will need a mix of braids using either narrow or wide strips. Work quickly to prevent the dough from getting warm, chill dough in fridge to firm up when necessary. After cutting enough strips, use leftover scraps for more cut outs; transfer to the chilled sheet pan with other cut outs. Place lattice strips and braids on a separate sheet pan, chill in the fridge until you are ready for final assembly; avoid the freezer as strips may become too stiff to handle later.

  5. In a large mixing bowl, fold pears, lemon zest (sometimes I zest the entire lemon for extra flavor), juice of 1 lemon, 1/4 cup sugar, tapioca flour, cinnamon, vanilla extract and sea salt. In a small bowl beat 1 egg with 1 tablespoon heavy cream. Set aside.

  6. For the final assembly, add even layer of 1/4 cup caramel at room temperature into chilled pie crust. If caramel is too thick to handle, warm on low heat, just enough to loosen but not too hot that it will melt the pastry. Layer half of the pear mixture in an even layer, top with 1/4 cup caramel, layer remaining pears and drizzle about 1/8 cup caramel. Scatter frozen butter cubes evenly all over the top layer. If time permits, chill pie in fridge or freezer for 10 minutes. NOTE: There will be some leftover caramel, keep in fridge for a few weeks or drizzle warm caramel over each slice when serving.

  7. Apply a very thin layer of egg wash around the rim of the pie using a small pastry brush, it will act as glue. Remove lattice pieces from fridge and bring to room temperature for a few minutes to prevent breakage. Begin lattice work by lightly arranging each element to create your design. When you're satisfied, trim the edges with scissors or a sharp paring knife. Begin to lift each piece alternatively to create the lattice and press down lightly along the rim to seal edges. For a traditional lattice layout, create 90° angles, but for an argyle arrangement try 45° angles.

  8. To complete the design, add a leaf and floral wreath border. Brush the back of the leave cut outs one at a time with egg wash to secure and place in a random pattern or alternate directions. Use a variety of flower shapes if possible and nestle them into the leaves trying not to cover up too much of the lattice work. For visual interest you can stack different sized flowers on top of each other. However be cautious to create too many layers as the pie thickness will affect the taste. Place pie in freezer preferable to the fridge to chill pastry, minimum of 20 minutes.

  9. Preheat oven to 425°F, with a pizza stone or Baking Steel on middle rack if possible. Just before baking, gently brush the pastry with a thin even layer of egg wash all over, avoid pooling. If any pieces become loose, glue them down with a small dab of egg wash. Place pie on a rimmed sheet pan and loosely tent entire pie with foil avoiding contact with the pie. Bake on the middle rack for 20 minutes. Reduce oven to 375°F and remove foil. Finish baking until filling is bubbling, and golden brown about 60 minutes more. Watch the pie carefully, rotate if necessary. Pro-tip, pie must be violently bubbling to ensure filling is cooked and bottom crust is crispy. Let pie cool completely before serving, minimum of 4 to 6 hours.

Springtime Garden Wreath pie design demo.